

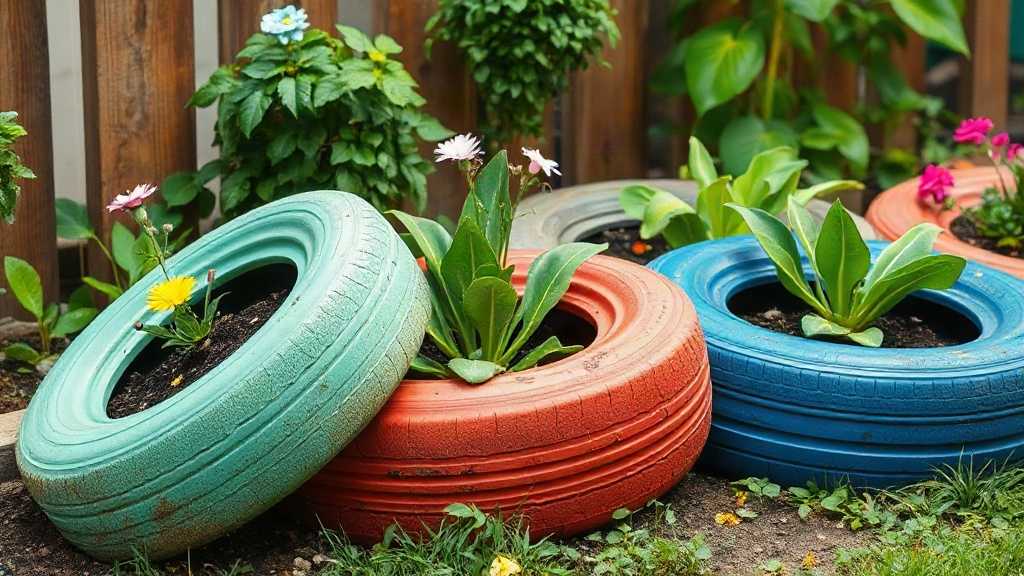
A stack of worn tires behind the garage can become the brightest corner of your yard, and you can learn to turn old tires into colorful garden with a few basic tools and a free afternoon. The real question is not whether a tire makes a good planter, because it does, but how to prepare it safely and paint it so the finish lasts more than one season. A reader planning a low-cost yard refresh will find the steps below practical and affordable. If you are also sketching a bigger yard design, Home Plan Idea offers useful layout references for placing raised beds and planters.
Quick answer: Clean the tire thoroughly, cut or flip it as needed, prime it, then coat it with exterior spray paint made for rubber or plastic. Paint in thin coats and let each one dry. Keep food crops in a lined inner pot, never directly against bare rubber.
What is turn old tires into colorful garden?
Turning old tires into garden planters means giving a used tire a second life as a growing container. The tire becomes the wall of a raised bed, a round accent pot, or a stacked tier in a flower display. Paint and a decorative rim hide what the object used to be.
Tires suit this job because of their shape and durability. A standard passenger tire holds a surprising volume of soil, roughly the size of a small raised bed ring. It will not rot, crack in frost, or fall apart after a rainy spring. Those same qualities that make scrap tires a disposal headache make them excellent garden shells.
The craft itself is simple. You wash the tire, decide on a form, coat it with paint, and plant it. Different approaches suit different yards:
- Whole upright tire as a ring planter. The tire sits flat on the ground like a shallow tub. Paint the outer wall and fill the middle with soil.
- Cut-and-flipped tire. One sidewall is removed and the tire is turned inside out, producing a wider bowl shape with a rolled rim.
- Stacked tower. Two or three tires are stacked and bolted or wired together, creating depth for potatoes, herbs, or trailing flowers.
- Hanging or wall-mounted version. A single painted tire mounts on a fence or shed, lined, and planted with compact flowers.
For most first-timers, the upright whole-tire ring is the sensible starting point. The cut-and-flip method gives a more polished look but demands a sharp utility knife, patience, and careful hand protection. The stacked tower suits anyone who wants volume for root crops.
A key distinction separates decorative planters from food-growing ones. Paint finishes, rubber compounds, and drainage behavior matter more when you plan to eat what grows inside. Many gardeners paint the outside for display and set a separate plastic pot, grow bag, or inner liner inside the tire ring for edibles. That arrangement keeps soil away from the rubber and makes replanting easy.
Whichever form you choose, the finished planter should drain well and look intentional. A painted rim and a tidy mulch layer do more for appearance than any elaborate design.
Key takeaway: A tire planter is really three decisions: the shape, the paint, and whether an inner liner protects the soil.
Why turn old tires into colorful garden matters
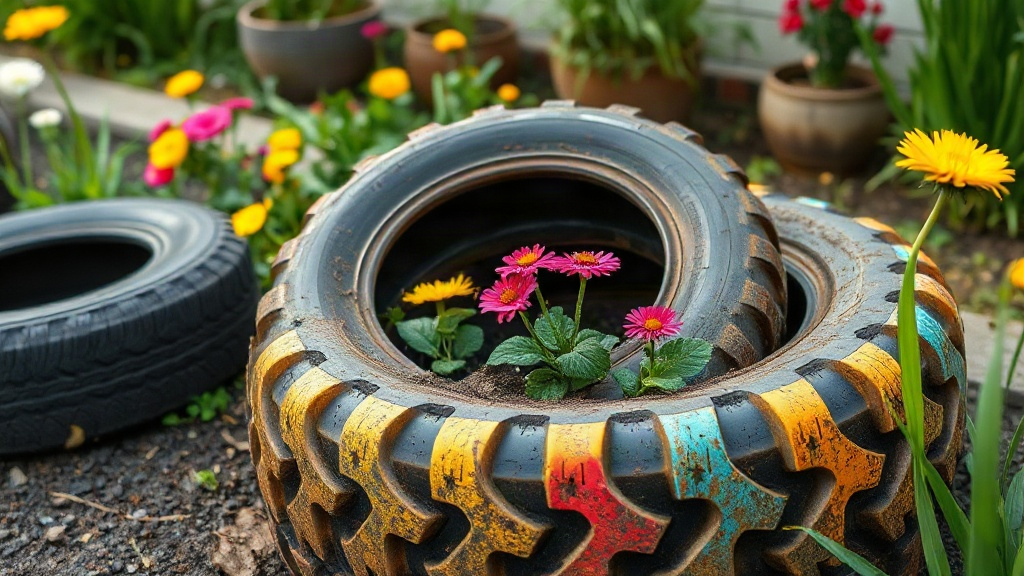
Color and cost sit at the heart of this idea. A gallon of exterior paint and a discarded tire cost far less than a comparable ceramic or resin planter, and few other materials give you a bold painted surface that large for so little money. A bright teal or terracotta tire reads as a deliberate design choice in a flower bed.
Waste reduction is the second argument. Tires are bulky and awkward to dispose of, and many municipalities handle them only through special collection days. Reusing one at home keeps it out of a landfill or a roadside pile. One tire turned into a planter is one tire that never needs hauling away.
Practical durability rounds out the case. An unpainted tire survives decades outdoors without structural failure. The weak point is always the paint, not the rubber. That means a properly primed and painted planter can sit through winters and summers with only occasional touch-ups.
Planters also solve real gardening problems:
- Weed suppression. A solid ring of rubber blocks grass and weeds from the planting area.
- Raised growing height. Stacked tires bring soil up to a comfortable level for people who dislike bending low.
- Poor-soil yards. You control the soil mix inside the tire, so clay or gravel underneath stops mattering.
- Heat retention. Dark rubber warms soil earlier in spring, which can help warm-season crops.
The technique also fits an existing decorating habit. Gardeners who already use crates, cans, and old sinks as containers will find tires blend right in; recycled garden decor covers similar projects that pair well with painted tire planters.
There are honest trade-offs. A bare tire looks like a bare tire, so paint is not optional. Rubber can leach compounds into surrounding soil over long periods, which is why lining edible plantings is wise. Heavy tires are also awkward to move once filled with damp soil.
Key takeaway: The value comes from low cost, genuine durability, and keeping bulky waste out of the disposal stream — provided you finish it properly.
Best practices
Good results come from preparation, not talent. Follow this order and the paint will hold and the plants will thrive.
- Wash and degrease. Scrub the tire with warm water and a strong household degreaser. Old road grime and tire-shine products stop paint from bonding. Rinse and let it dry in full sun for a day.
- Roughen the surface lightly. A quick pass with medium sandpaper or a stiff brush gives the primer something to grip.
- Prime first. Use a primer made for rubber, plastic, or exterior hard surfaces. Spray or brush a thin coat and let it cure fully.
- Choose the right paint. Exterior spray paint labeled for plastic or rubber, or exterior acrylic with a flexible additive, flexes with the tire instead of cracking. Bright colors show best over white primer.
- Paint in thin coats. Two or three light passes beat one heavy coat. Heavy paint runs, pools in the tread, and peels first.
- Handle drainage. Drill several holes around the lower sidewall if the tire sits on solid ground or a patio. Standing water kills roots.
- Line before planting. Fit cardboard, landscape fabric, or a plastic liner inside the ring. For edibles, set a separate pot inside rather than planting against bare rubber.
- Fill and plant. Use a light potting mix rather than heavy garden soil, which compacts in a shallow container.
Color choice deserves a moment. Deep colors such as navy or forest green recede and make foliage look fuller. Bright primaries draw the eye and suit playful play areas. White shows dirt fastest. Painting the inner rim a contrasting shade gives a neat finished edge.
A clear exterior sealer over the finished paint adds a season of protection, especially on the top rim where sun and water hit hardest.
Timing matters too. Paint in dry weather between roughly 60°F and 85°F. Cold slows curing and humidity traps moisture under the film. Let painted tires cure for several days before adding soil.
Key takeaway: Degrease, prime, paint thin, and line before planting — the sequence does most of the work.
Common mistakes to avoid
Most failures trace back to skipping a step rather than bad luck. Watch for these traps.
Painting a dirty tire. Paint over road grime or silicone tire dressing will flake within weeks. If the paint peels, the surface was almost certainly not clean enough.
Skipping primer. Paint adheres poorly to bare rubber. Primer costs little and roughly doubles the life of the finish.
One thick coat instead of several thin ones. Thick paint skins over, traps solvent, and cracks as the rubber flexes. It also fills the tread pattern unevenly.
Forgetting drainage. A tire on a patio or hard ground becomes a basin after rain. Roots rot in saturated soil. Drill holes before you fill.
Planting edibles directly against bare rubber. Rubber and its additives can migrate into nearby soil. Use an inner pot or liner for vegetables and herbs, and keep painted surfaces away from the root zone.
A utility knife blade can slip suddenly on curved rubber. Wear cut-resistant gloves, cut away from your body, and lubricate the blade with soapy water.
Underestimating the weight. A filled tire holds a lot of damp soil. Place it where it will stay, or build it on a pallet with wheels.
Using heavy garden soil. Clay soil turns a tire planter into a brick. Light potting mix drains and lets roots spread.
Ignoring local rules. Some neighborhoods and municipalities restrict visible tire planters. A quick check avoids a dispute later. Repainting with a fresh coat every couple of years also keeps the planter looking maintained rather than abandoned.
Key takeaway: Clean surfaces, primer, drainage, and a liner prevent nearly every common problem.
FAQ
How much does it cost to make a tire planter?
Expect modest costs: a used tire is usually free, and primer plus two cans of exterior paint typically run in the range of a small home-project budget. The liner or inner pot adds a little more. Compare that to buying a planter of similar size.
Can I grow vegetables in a painted tire?
Yes, with a liner. Set a food-safe plastic pot or grow bag inside the tire ring and fill that with potting mix. This keeps roots away from bare rubber and painted surfaces while still giving you the decorative exterior.
How long does the paint last on a tire planter?
A properly cleaned, primed, and thin-coated finish usually holds for two to three seasons before touching up. Sun exposure and flexing are the main causes of wear. A clear sealer and an annual inspection extend the finish.
Is it safe to cut a tire without power tools?
It is possible with a sharp utility knife, soapy water for lubrication, and cut-resistant gloves, but it takes time and patience. A reciprocating saw makes the job faster and safer. Beginners should start with an uncut tire and move to cutting later.
When is the best time to paint a tire planter?
Choose a dry day with temperatures between roughly 60°F and 85°F. Avoid humid or windy conditions, which affect curing and can blow dust onto wet paint. Let the finished tire cure for several days before planting.
Conclusion
Turning old tires into colorful garden planters rewards careful preparation more than artistic skill. Clean and degrease the rubber, prime it, and build color in thin coats. Drill drainage holes, line the inside, and keep edibles in a separate inner pot. Do those things and a scrap tire becomes a durable, bright container that costs little and lasts for years.
Start with one tire this weekend. Wash it, prime it, and pick a bold color — then decide where it belongs in the bed before you fill it with soil.



Leave a Reply