Family photographs preserve memories that often span generations. However, printed photos can fade, tear, or suffer water damage over time. According to archival experts, color photographs can lose quality within a few decades without proper storage. Meanwhile, millions of family photos remain stored in boxes and albums across American homes. Therefore, digitizing old physical family photo albums helps protect precious memories while making them easier to share and organize for future generations.
Why Digitizing Family Photos Matters
Printed photographs face several risks throughout their lifespan. Heat, humidity, sunlight, and handling gradually reduce image quality. As a result, many treasured family collections deteriorate before owners notice the damage. Digital copies provide a reliable backup against these threats.
Digital photos also improve accessibility for family members. You can quickly share images with relatives across different states. In addition, digital storage allows easy searching and organization. Consequently, family history becomes easier to preserve and enjoy.
Many people focus only on preserving images. However, preserving the stories behind those images matters equally. Digital archives allow you to attach dates, names, locations, and personal notes. Therefore, future generations gain valuable context instead of viewing unidentified faces.
Prepare Your Photo Collection Before Scanning
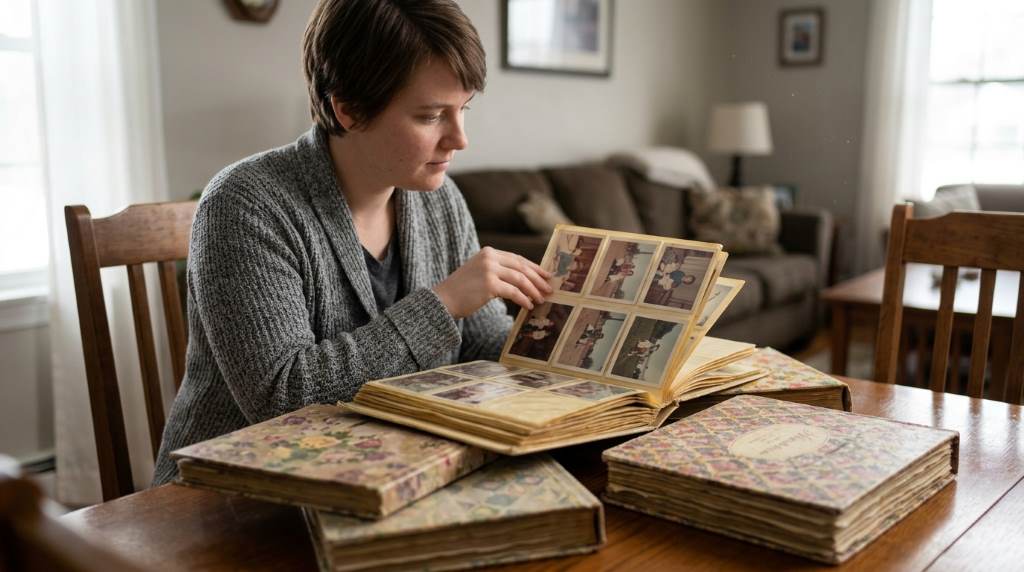
Start by gathering all albums, loose photographs, negatives, and printed pictures. Next, sort them into categories such as family events, vacations, holidays, or decades. This step simplifies the scanning process later. Moreover, organized collections reduce confusion during file management.
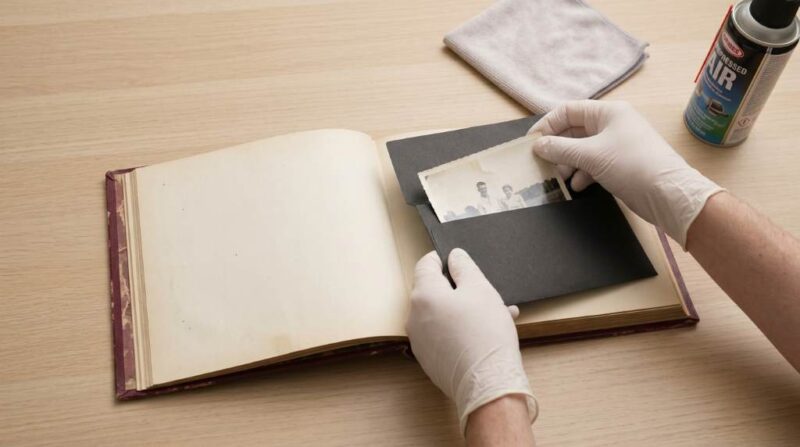
Inspect every album carefully before removing photographs. Older albums sometimes contain fragile adhesive pages. Therefore, handle each page gently to prevent accidental damage. Additionally, wear clean hands to avoid transferring oils onto prints.
Create a simple inventory list before scanning begins. Record album names, estimated dates, and important family members. This preparation saves significant time later. As a result, digital organization becomes much easier.
Choose the Best Digitization Method
Using a Flatbed Scanner
A flatbed scanner remains one of the most reliable options for home digitization. It produces high image quality and accurate color reproduction. Furthermore, it works well with fragile photographs. Many households already own one.
Set scanning resolution between 600 and 1200 DPI for valuable family photos. Higher resolutions capture more detail for future restoration work. However, larger files require additional storage space. Therefore, balance quality and storage needs carefully.
Using a Smartphone Scanning App
Modern smartphone apps offer a convenient alternative for quick projects. Many apps automatically correct glare and perspective distortion. As a result, users can digitize photos without specialized equipment. This option works well for beginners.
Place photos on a flat surface near natural light. Then hold the phone directly above the image. Consistent lighting improves results significantly. Additionally, avoid shadows during capture.
Using a Dedicated Photo Scanner
Dedicated photo scanners process large collections faster than flatbed scanners. These devices automatically feed multiple photographs. Therefore, they save considerable time when digitizing thousands of images. Families with extensive archives often prefer this solution.
Clean Photos Before Scanning
Dust and debris reduce image quality during scanning. Therefore, clean photographs before creating digital copies. Use a soft microfiber cloth for gentle cleaning. Never use household cleaning products on printed photos.
If you discover mold or severe damage, proceed carefully. Damaged photographs require extra caution during handling. Moreover, aggressive cleaning can worsen existing problems. When necessary, consult a photo restoration professional.
Use the Right File Formats
Selecting proper file formats affects long-term preservation. TIFF files preserve maximum image quality without compression. Therefore, many archivists prefer them for master copies. However, TIFF files require substantial storage space.
JPEG files offer smaller sizes and easier sharing. Consequently, they work well for everyday use and family distribution. Many families store both formats simultaneously. This approach provides flexibility and protection.
Organize Files for Future Generations
Good organization prevents confusion years later. Create folders based on decades, family branches, or major events. Then use clear file names for every image. Consistent naming systems improve searchability.
A practical naming format might include the year, event, and family name. For example, “1988_Family_Reunion_Smith.jpg” provides useful information immediately. As a result, relatives can identify images quickly. This method saves time for everyone.
Add metadata whenever possible during the organization process. Include names, locations, dates, and important details. Furthermore, many photo management programs support metadata tagging. Therefore, future searches become much easier.
Back Up Your Digital Collection
Never store digital memories in only one location. Hard drive failures occur without warning. Therefore, maintain multiple copies of every important image. Redundant storage significantly improves protection.
Follow the popular 3-2-1 backup strategy. Keep three copies of your files. Store them on two different media types. In addition, place one copy offsite or in cloud storage.
- Primary computer storage
- External hard drive backup
- Cloud storage backup
This method greatly reduces the risk of permanent loss. Consequently, family memories remain secure even during unexpected events.
Handle Climate Challenges During Digitization
Climate conditions can affect both physical photographs and scanning equipment. In humid regions, photos often develop mold, curling, or sticking. Therefore, work in a cool and dry room whenever possible. Proper conditions improve safety.
Hot summer temperatures can also accelerate photo deterioration. As a result, avoid leaving albums in attics, garages, or vehicles. Store materials indoors before digitization begins. Stable temperatures help preserve image quality.
During rainy seasons, moisture levels often increase indoors. Consequently, consider using a dehumidifier in your workspace. This simple step helps protect valuable photographs. It also improves scanning conditions.
An Often Overlooked Step: Record Family Voices
Most digitization guides focus exclusively on photographs. However, an uncommon yet valuable practice involves recording family stories during the process. Ask parents, grandparents, and relatives to explain each image. Their memories add meaning that photos alone cannot provide.
Create short audio recordings while reviewing scanned pictures together. Then store those recordings beside corresponding images. As a result, future generations hear stories directly from family members. This approach transforms a photo archive into a living family history collection.
Many families regret waiting too long to document personal stories. Therefore, capture these details while relatives can still share them. The combination of photographs and recorded memories creates a richer archive. Few preservation projects offer greater long-term value.
Restore and Enhance Old Images Carefully
Photo editing software can improve faded or damaged photographs. Basic adjustments often restore brightness, contrast, and color accuracy. However, avoid excessive editing that changes historical authenticity. Preservation should remain the primary goal.
Create separate edited copies rather than replacing original scans. This practice protects the untouched master version. Additionally, future software may provide better restoration capabilities. Keeping originals ensures maximum flexibility.
Common Mistakes to Avoid
- Scanning only low-resolution copies
- Skipping file organization
- Ignoring backup procedures
- Using unclear file names
- Throwing away originals too soon
- Forgetting photo descriptions and dates
Avoiding these mistakes improves the value of your digital archive. Moreover, proper planning prevents future frustration. Small details often make a significant difference. Therefore, take time to build a strong system.
Conclusion
Digitizing old physical family photo albums at home protects irreplaceable memories from damage and loss. By organizing collections, using suitable equipment, selecting proper file formats, and creating reliable backups, you can build a secure digital archive. Furthermore, recording family stories alongside photographs adds a unique layer of historical value. Start with one album today, follow a consistent process, and preserve your family history for generations to come.
FAQs
What resolution should I use when scanning old family photos?
Use 600 DPI for most photos and 1200 DPI for valuable images needing future restoration.
Can I digitize photos using my smartphone?
Yes, modern scanning apps provide excellent results when used with proper lighting.
Should I keep original photographs after scanning?
Yes, always keep original photographs as an additional preservation backup.
Which file format is best for long-term storage?
TIFF provides the highest preservation quality for archival purposes.
How many backups should I maintain?
Keep at least three copies stored across different locations and storage types.